For sure, gone are the days when having AX environment used to take
days. If you already have investment in the cloud and planning to go
with Dynamics AX, choosing Microsoft Azure should be a straight forward
decision. With AX going cloud and Microsoft releasing next big version
of AX exclusively on Azure (on-premise coming late in 2016), should
indicate where things are heading in ERP world or in general with IT. AX
is now also available as an Azure Marketplace offering, where partners
can release their solutions as ready to go thing. Companies are now also
moving from the initial cloud hesitation and adopting the elastic
technology that helps scale with rapidly growing business requirements.
That said, let's see how to deploy Dynamics AX 2012 R3 workload on Microsoft Azure in less than 60 minutes.
Step 1)
Login to
Lifecycle Services using your CustomerSource or PartnerSource account.
Step 2) Create LCS Project
A project is an umbrella to manage AX implementation. Customers and
Partners can invite each other to participant in the implementation
process.
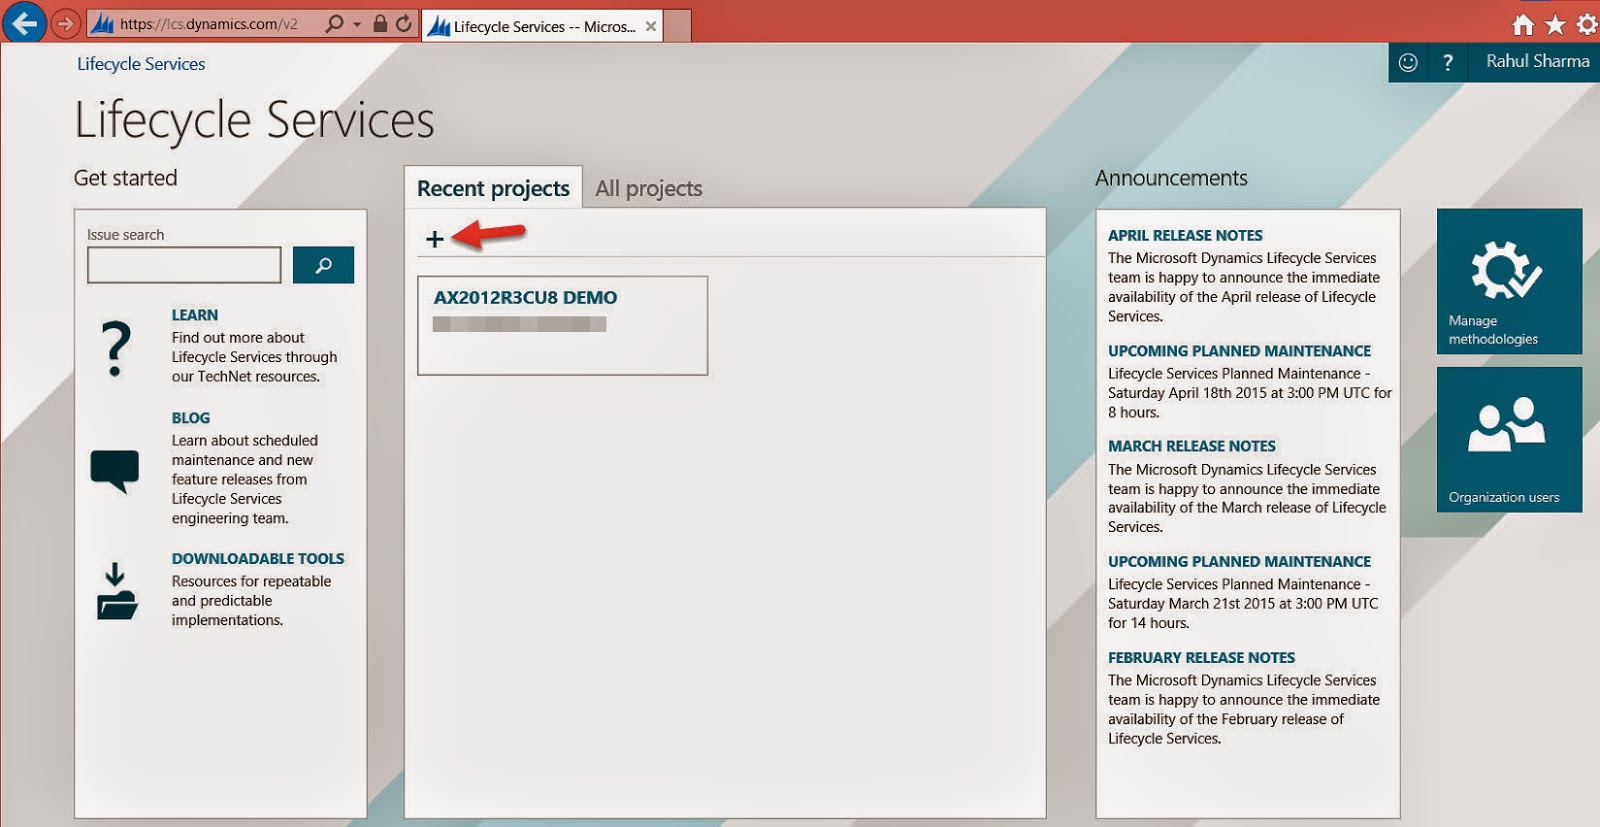 |
| Figure 1: Create Project |
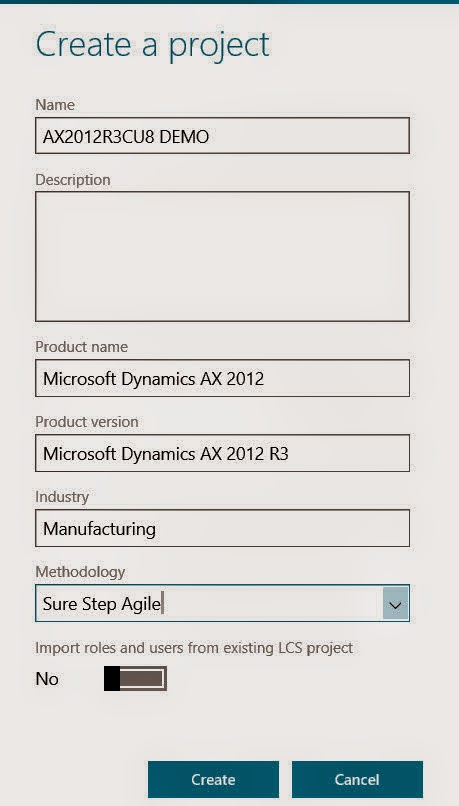 |
| Figure 2: Select product name, version, industry and methodology |
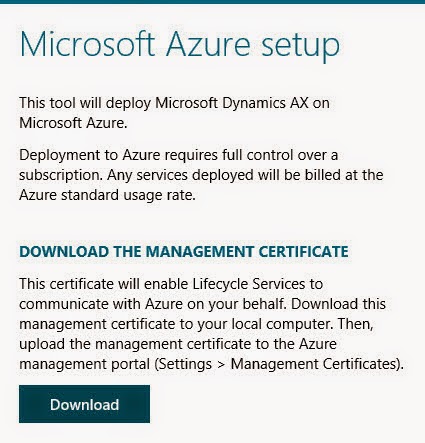
Step 3) Map LCS Project with Azure
Configure Microsoft Azure for this project. This will connect the project with your Microsoft Azure subscription.
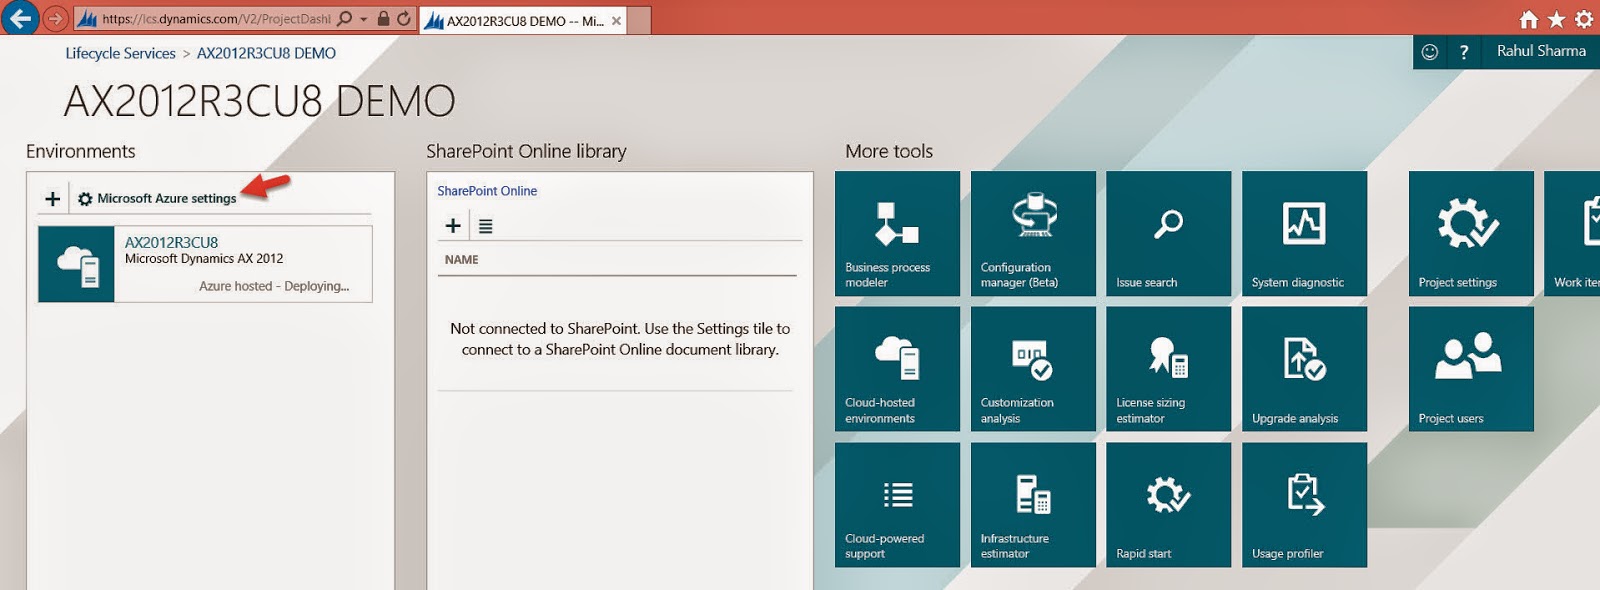 |
| Figure 3: Map Azure subscription with LCS Project |
Fill out your Azure subscription and download the Management Certificate.
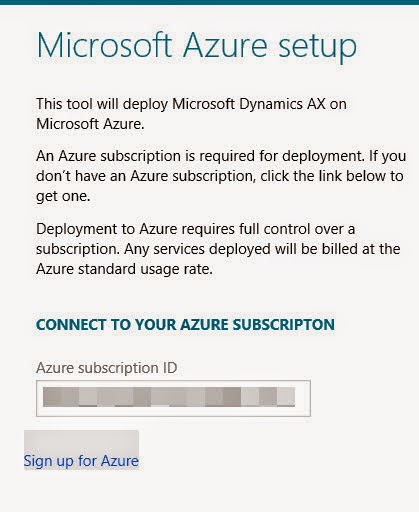 |
| Figure 4: Your Azure subscription id |
 |
| Figure 5: Download and save |
Upload this certificate to your Microsoft Azure account.
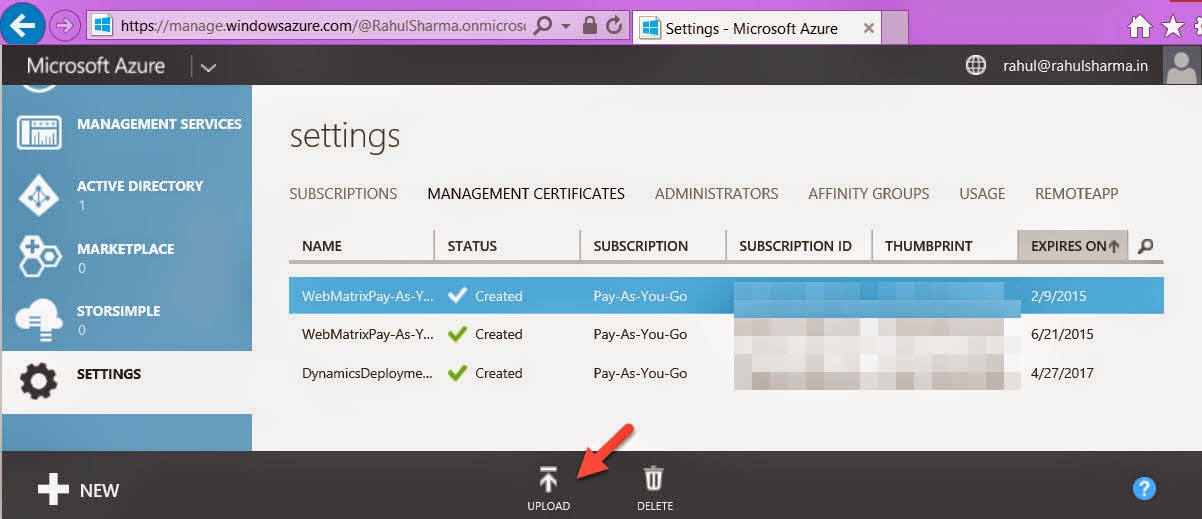 |
| Figure 6: Upload to your Azure subscription |
Complete the Microsoft Azure Setup wizard.
Step 4) Deploy AX to Azure
Once you have your Azure subscription connected to your LCS project, you
can now deploy AX to Azure. As of this writing LCS tool only supports
DEMO, DEVELOPMENT and TEST deployments to Azure.
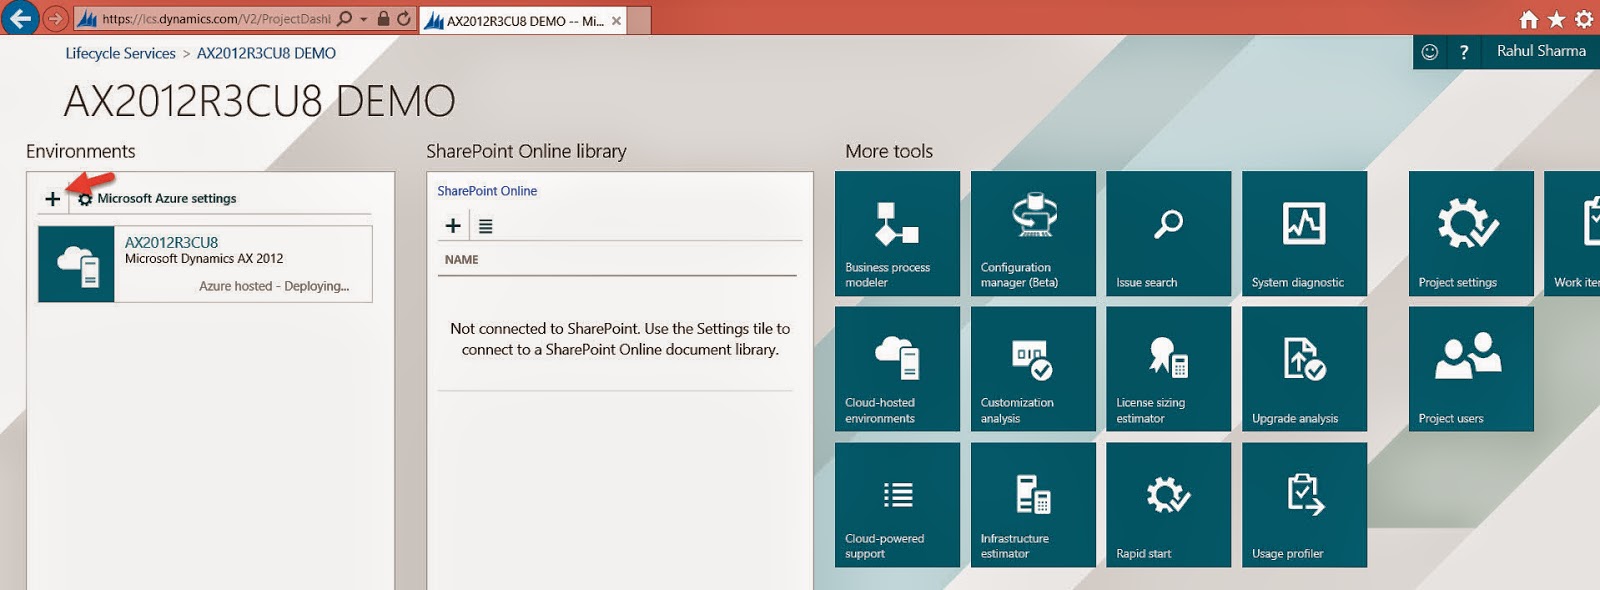 |
| Figure 7: Add environment |
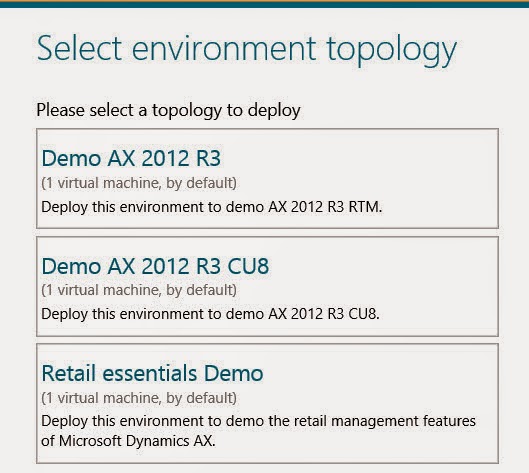
We will deploy DEMO AX instance (Contoso) for now that will be deployed on one Virtual Machine.
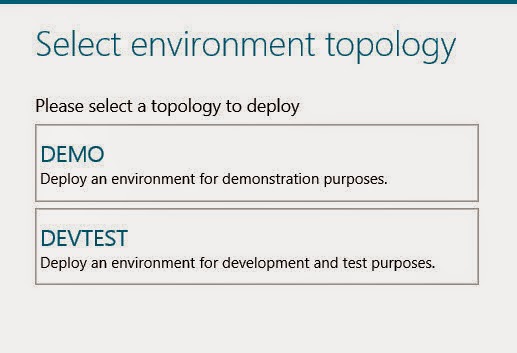 |
| Figure 8: Select topology |
Select your AX version. Remember the selection will depend on the Project’s product version attribute.
 |
| Figure 9: Select AX version |
Provide AX environment name and VM size.
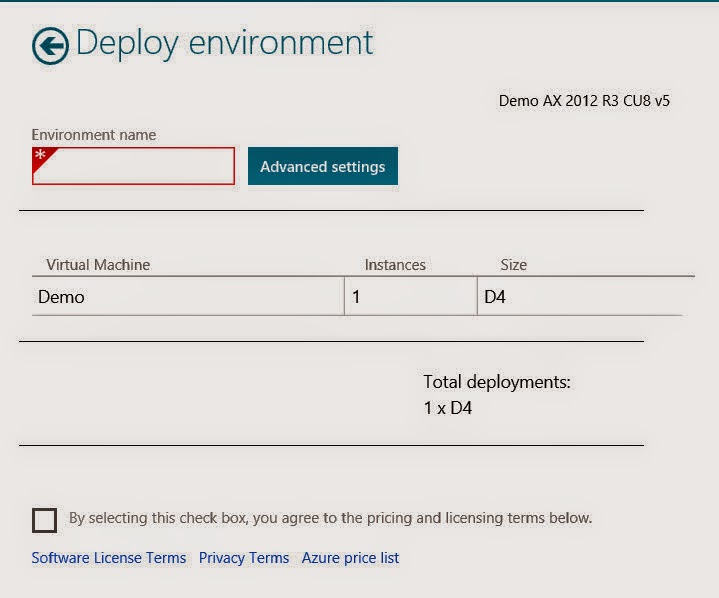 |
| Figure 10: Environment name and size |
Click finish to complete the setup. The process will take some time depending on VM size selected.
 |
| Figure 11 |
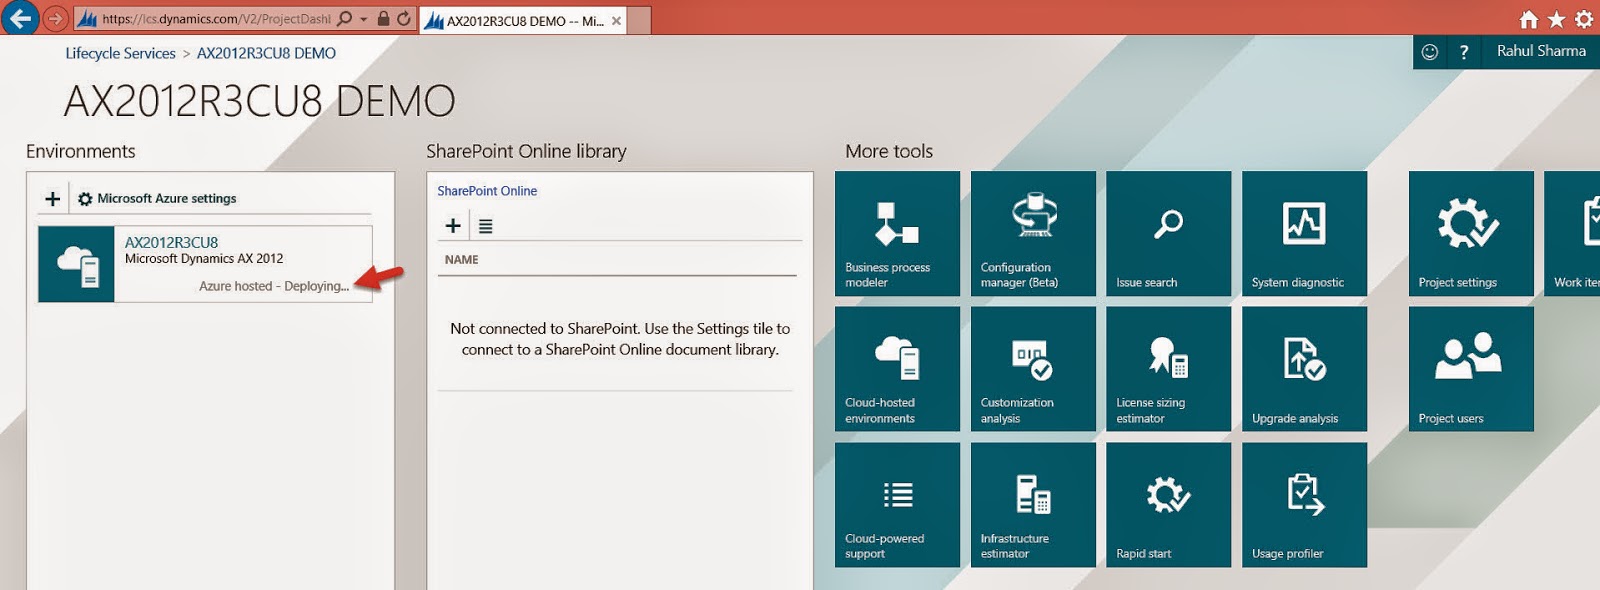
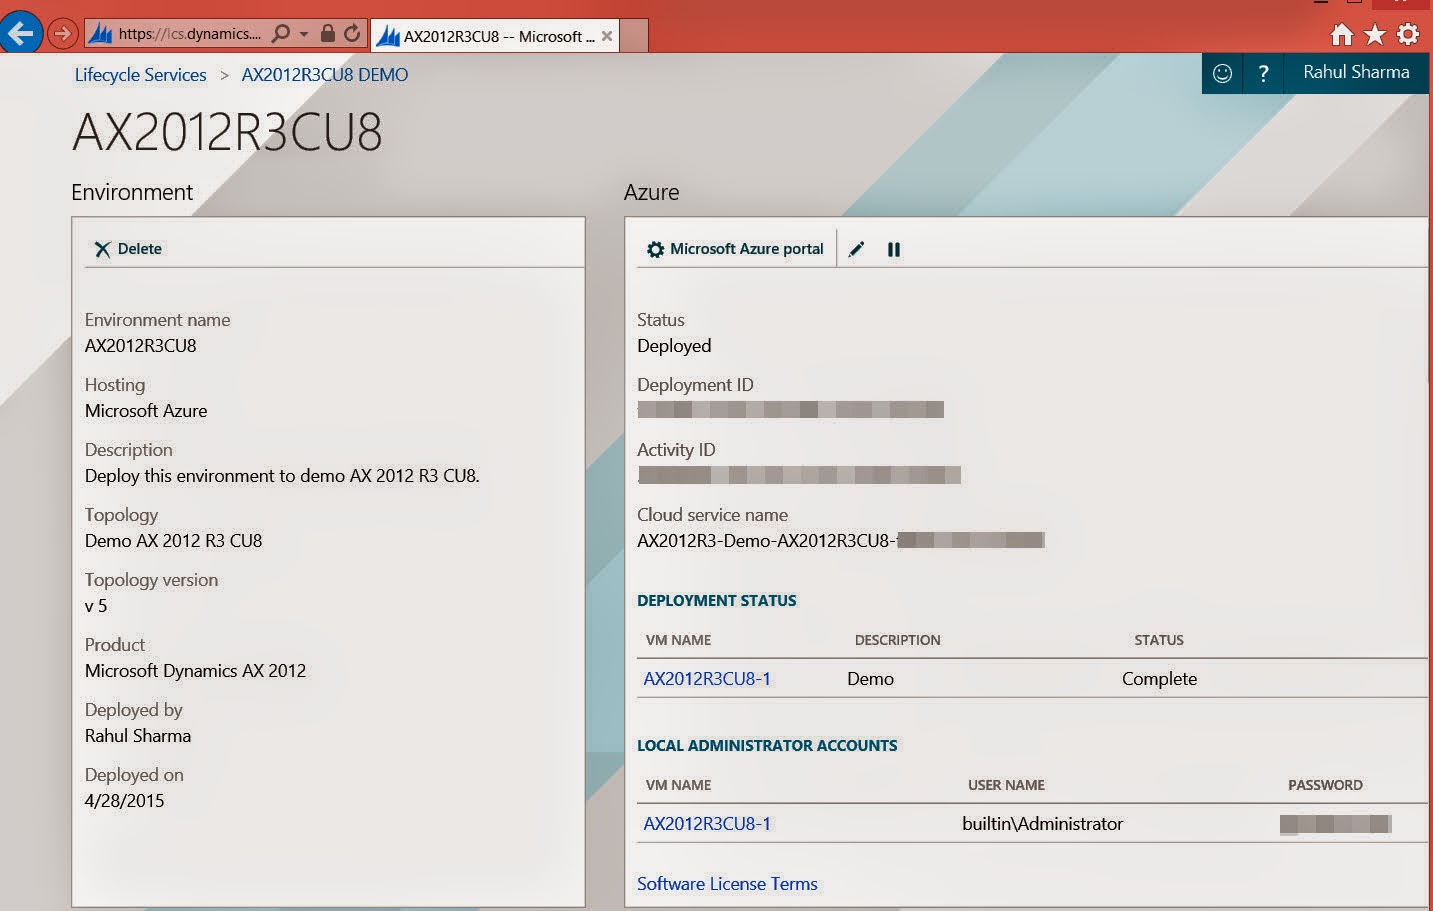
Once finished, you can see you newly created VM in LCS or on your Azure
account. You can click on VM link that will provide you RDC file to
connect with
Contoso\Administrator credentials.
 |
| Figure 12: LCS status |
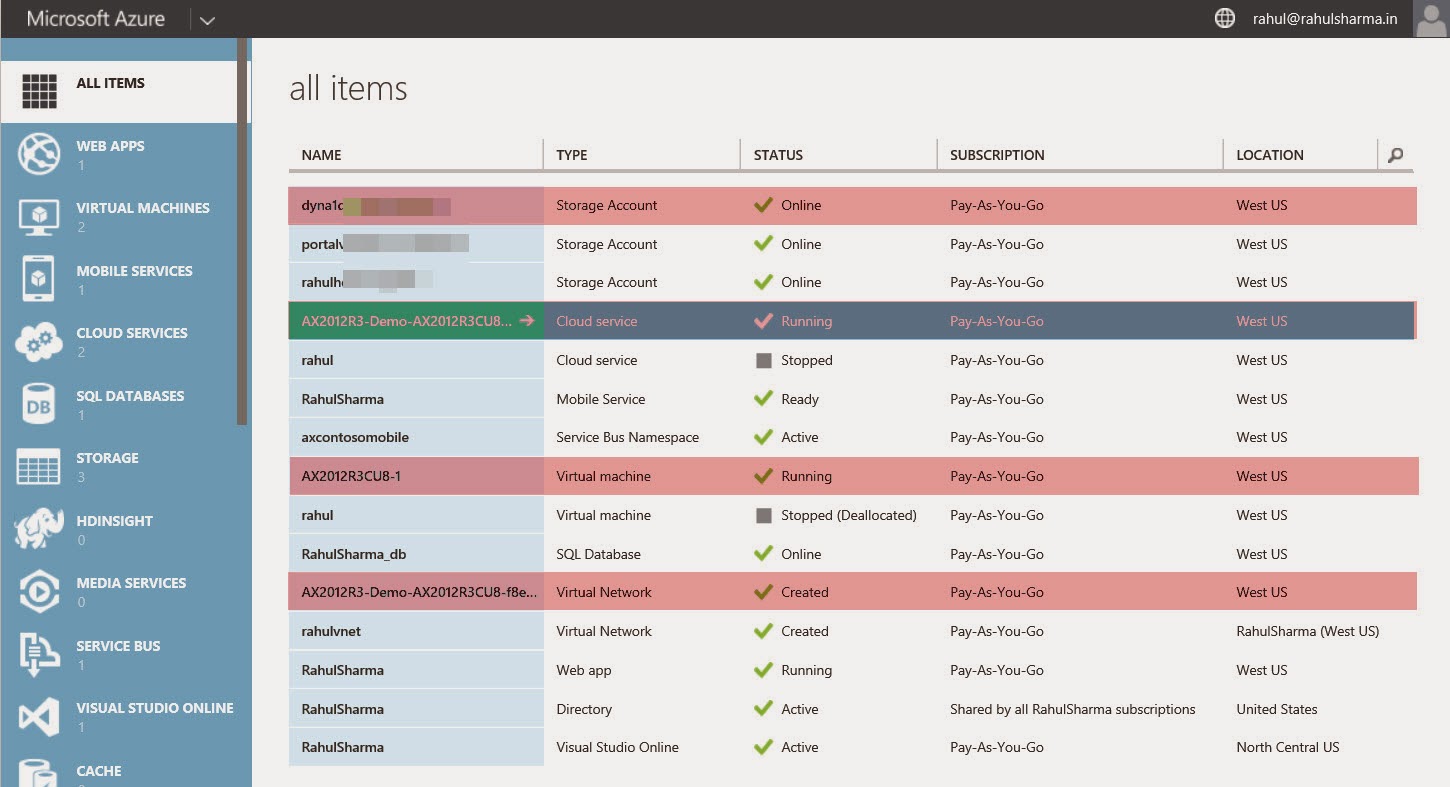 |
| Figure 13: Azure status |
While reading this blog every concepts are clearly able to understand.
ReplyDeleteAzure Training in Chennai | Certification | Azure Online Training Course | Azure Training in Bangalore | Certification | Azure Online Training Course | Azure Training in Hyderabad | Certification | Azure Online Training Course | Azure Training in Pune | Certification | Azure Online Training Course | Azure Training | microsoft azure certification | Azure Online Training Course
perde modelleri
ReplyDeleteSMS ONAY
Vodafone Mobil Ödeme Bozdurma
nft nasıl alınır
ankara evden eve nakliyat
trafik sigortasi
DEDEKTÖR
Site kurmak
aşk romanları
Good text Write good content success. Thank you
ReplyDeleteslot siteleri
kibris bahis siteleri
betpark
bonus veren siteler
tipobet
mobil ödeme bahis
betmatik
poker siteleri
dijital kartvizit
ReplyDeletereferans kimliği nedir
binance referans kodu
referans kimliği nedir
bitcoin nasıl alınır
resimli magnet
Z6N2