Hello Readers,
Until AX 2012 version, personalizing the forms and
adding/removing data fields on them was a very important and widely used
feature used by customers.
This quick post will help you understand how “Personalizing” looks in the new Dynamics AX. Let us take a look one by one.
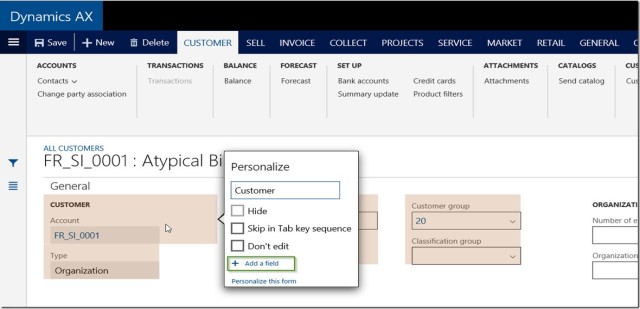
When you are on a form or a navigation page in the
new Dynamics AX, you can bring up your favorite Personalize options
using the “Right click > Personalize:Form section” option. For
example, I navigate to the Accounts Receivable > All Customers >
Customer Details form/page > General fast tab and right click on it.
How to add a new data fields on a form/page:
-
Navigate to the form that you want to Personalize.
-
Right click > Personalize: Form section, i.e Personalize:Customer

-
Click + Add a Field to load the field list form.
-
Select the data fields you want to add and click Insert button.

-
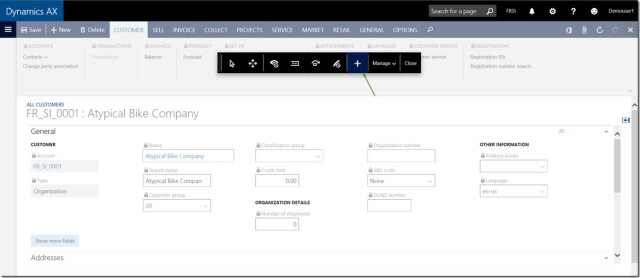
Another way of adding a data field on a form is to select “Personalize this form” option after right click and Personalize.
- Note that you can also launch the Personalization pane by navigating to Options > Personalize this form button.


-
Click the + button to load the data field list form. Select the data fields you want to add and click Insert button.
How to change properties of a data field:
- Once you are on the Personalize form screen, select the “Arrow’ button to enable the property changes for various data fields on the form.

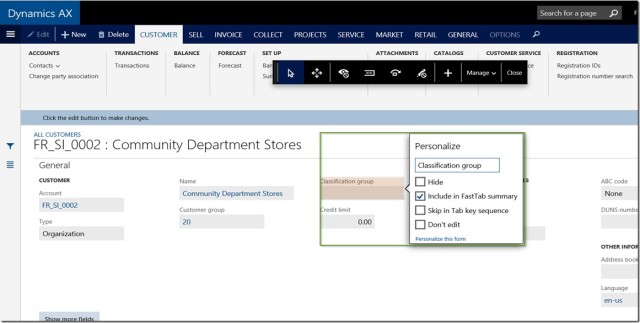
Hide: Mark this to Hide the selected data field on the form.
Include in Fast Tab Summary: Mark
this to show the value of this data field on the Fast tab header summary
of the fast tab, under which the data field is present.
Skip in Tab key sequence: Mark this to skip this data field on the tab key sequence.
Don’t edit: Mark this to block editing of this data field.
For example, let us mark the Include in fast tab
summary for the Classification group field and see that it appears on
the fast tab Summary.

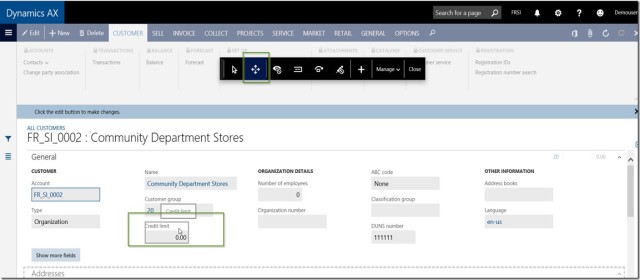
How to rearrange or move around data fields on a form:
-
Once you are on the Personalize form, select the MOVE option on the Personalization pane and just drag and drop fields to move them around on the form as shown in screenshot below.
How to show/Hide data fields on a form:
-
On the Personalization pane, Select the Hide/Show button.
-
Now mark the data fields that you want to Hide/show.
-
If you had already made a field hidden, when you try to Hide/Show next time on the form, you can see those fields as marked for Hidden.
-
For example if I want to hide the ABC Code field hidden on the customer details form, I can mark that and upon refreshing the form, the field will be hidden.

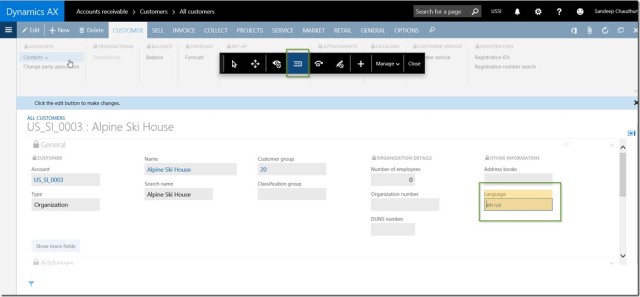
How to add fields to show on the collapsed fast tab summary:
-
On the Personalization pane, Select the Summary button.
-
Now mark the data fields that you want to add to the fast tab Summary when collapsed.
-
For example, I have added the Language data field on the General fast tab.
How to change the display name of a data field:
- On the AX form/page on a specific data field, right click and Personalize.
-
You can type in the name that you would like to see as the display label for the data field.
-
For example, I have renamed the Search name field to My Search Name on the Customer details form.

How to block editing of a data field:
-
On the form Personalization pane, click the Edit button.
-
Mark all the data fields that you would like to be shown as Non-editable fields.
-
For example, on the Customer details form, I want the Classification group field to be shown as non-editable.


How to Reset/Clear out all my Personalization:
- If you decide to clear out all your form/page personalization, click on Manage > Clear button on the form Personalization Pane.
- Reload the page.


How to add form data as a Tile onto a workspace:
- You can also add a filtered data view, i.e. data on a particular form as either a Live Tile or as a list on any workspace you like.
- For example, I can add the Timesheets for my review as a Live tile to the Manager Self-service workspace.


Additionally, you can also Import and export form personalization using the Manage > Import/Export option on the form Personalization pane.

No comments:
Post a Comment