Interview Questions

Thursday, June 25, 2015

How to create a new instance in AX 2009?

Step1:
Copy the application folder to C:\Program Files\Microsoft Dynamics AX\50\Application\Appl and
rename the folder.

Step2:
Create one new database in sql management studio and restore the database with any .bak files.
Start ->All programs ->MS Sql server -> MS Sql management studio -> Database -> Right click ->New
Database ->(give database name) -> Database will create.
Right click the new database -> Tasks -> Restore -> Database -> select the .bak file ->ok -> select restore
in check box -> go to options -> select over write checkbox ->ok (then it will start executing).

Step3:
Start installing the AX setup -> select Add or remove components -> select the server name and
database name and give the TCP/IP port no(different from the existing no. i.e., unique no.) -> select Use
NT authority service -> Install ->Finish.

Step 4:
Start -> Administration Tools -> MS AX 2009 server configuration -> creates one new configuration. In
AOS tab give alternate bin directory “C:\Program Files\Microsoft Dynamics AX\50\server\(instance
name folder)\bin” ,application instance from dropdown select appropriate instance and give TCP/IP port
as it is given during installing AX setup.
In Database connection tab -> give server name and select the appropriate newly created database
name -> apply -> ok.

Step5:
Start -> Administration Tools -> MS AX 2009 configuration -> creates one new configuration -> give
configuration name ->ok.
In connection tab click add -> give server name, instance name and port no ->ok.
Select the corresponding instance ->apply ->ok.

Tuesday, June 23, 2015

Install Dynamics AX Without Having Real Domain

To know how to do it please follow the below steps:

1-This is the problem we face when trying to install without being connected with domain

2-Starts by adding "Virtual Switch Manger" in the hyper-v Manager

3-Create External Switch from the "Virtual Switch Manger"

4-Import Dynamics AX VM. (If You don't know how to import Dynamics AX VM please review Click Here).

5-From the VM Settings form Select Network Adapter then press the add button.
 Then select the External Network Adapter that we created previously and press apply button. 

6-Start the VM and login then go to the VM Network connection. select the connection and open the properties screen. Double click on the internet Protocol Version 4. 

7-Notice that the VM IP Address does not exist within your network.


8-Do the following:
 a- change the IP Address to be within your network(Remember this IP you will need it later).
 b- Use 255.255.255.0 within the subnet mask.
 c- Use you router IP with the Default gateway.
 d- In the Preferred DNS Server use the same IP address that you use in step a.
 e- In the alternate DNS Server use the same IP address that you use in step c. then press ok

9-After we finished the VM network setup. We need to do the same thing with the host network(your PC). minimize the VM windows and go back to your desktop.


10- Now go to your PC Network Connections then open the properties windows for the external connection.

11-Double click on the internet Protocol Version 4. Do the following:
 a- Select "Use the following IP Address" then change the IP Address to be within your network.
 b- Use 255.255.255.0 within the Subnet mask.
 c- Use you router IP with the Default gateway.
 d- In the Preferred DNS Server use the same IP address that you assigned to the network connection in the VM.
 e- In the alternate DNS Server use the same IP address that you use in step c. then press Ok.

12- Now run the system proprietaries windows in the host (Your PC). And Click the Change Button.

13- Write CONTOSO in the Domain field. Then Press OK.

14- The system will prompt to enter username and password with permission to join the domain. use "Administrator" as a username and "Pass@word1" for password. Then Click OK Button.

15- If everything going right the a welcome screen will appear. Press OK.

16- Restart The System.

17- Now we need to create a domain user to use during the AX installation process. To do that login to the VM and open the Active Directory Users and Computers. then add New user.

18- Click Next.

19- Assign the user password and click next.

20- Click Finish Button.

21- Select the new user and open the proprieties windows.

22- Add the User to the administrator group. minimize the VM.

23- now in the Host (Your PC) Press Alt + Ctrl + Delete then select "Switch User", Login to the domain user that we created previously. 

24- Run the Dynamics AX Setup.Then select Validate System Requirements.

25-Select The Component and press validate.

26- Congratulation, the domain user account success. Now you can continue AX installation smoothly.


Payments in advance ( prepayment ) To a Vendor | AX 2012

Payments in advance ( prepayment ) To a Vendor | AX 2012

This Article discuss Payments in advance ( prepayment ) to a Vendor. This article divided into three parts
  • Introduction
  • Setup (Step by step with screenshots )
  • Implementation (Step by step with screenshots )
Introduction:                                                                            

Accounting practices in many countries/regions require that prepayment journal vouchers, or payments in advance, from a customer or to a vendor not be posted to the usual summary accounts for the customer or vendor. Instead, these prepayment journal vouchers must be posted to special ledger accounts for prepayment journal vouchers. When a sales order or purchase order is made, an invoice is issued to the customer or vendor. When the invoice is paid, the prepayment journal voucher and sales tax prepayment journal voucher on the ledger accounts for the prepayment journal vouchers are reversed. The invoice amounts are then automatically posted to the usual summary accounts. 
    • Create Prepayment Posting Profile
  1. Click Accounts Payable > Setup > Vendor Posting Profiles.

  2. Click New to Create New Posting Profile


  3. Write the posting profile name in the Posting Profile Field for example "PRE".


  4. Write the posting profile description in the Description Field for example "Prepayments".

  5. Go to the Setup Section.


  6. Click the Add Button and select All form the Account Code Filed to apply the setup for All Vendors in the legal entities


  7. Select the prepayment summary account from the summary Account filed.


  8. (if required) Select the prepayments sales tax Account from Sales Tax prepayments Filed. 


  9. Press the Close Button.


    • Setup Account Payable parameters to use prepayment posting profile 
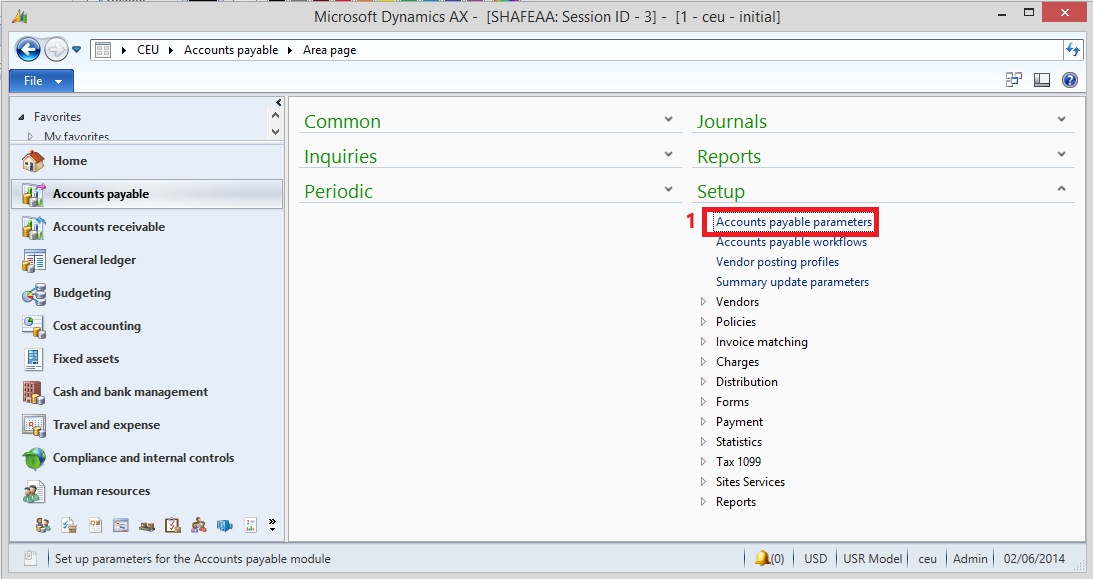
  1. Click Accounts Payable > Setup > Accounts Payable parameters.


  2. Click Ledger and sales tax from the left pane then open the prepayment journal voucher Section .


  3. If sales tax is calculated and posted when you post a prepayment journal voucher, select the Sales tax on prepayment journal voucher check box. 


  4. In the Posting profile with prepayment journal voucher field, select a posting profile to indicate the accounts to which the prepayment journal voucher and sales tax prepayment journal vouchers are posted. (Select the Posting profile was created in the previous setup)
  5. Press the Close Button


Implementation:                                                                      
  • Create a prepayment journal voucher
  1. Click Accounts Payable > Journals > Payments > Payment journal.  
      
  2. Create a journal.
      

  3. On the Setup tab, select the Amounts include sales tax check box if you want to post the prepayment journal voucher together with sales tax amounts.

  4. Click Lines, and then create the payment line.

  5. On the Payment tab, select the Prepayment journal voucher check box. The posting profile changes automatically to the posting profile for the prepayment journal voucher.

  6. Post the prepayment journal voucher.

  • Settle Customer invoice with the prepayment.
  1. Click Accounts PayableCommon Vendor Invoices Open Vendor Invoices.


  2. Select Invoice and Click the Settle Open Invoice Button.
  3. In the Settle open transactions form, settle the invoice with the prepayment journal voucher

Number groups (form) [AX 2012]

Number groups (form) [AX 2012]

Applies To: Microsoft Dynamics AX 2012 R3, Microsoft Dynamics AX 2012 R2, Microsoft Dynamics AX 2012 Feature Pack, Microsoft Dynamics AX 2012
Click Inventory management > Setup > Dimensions > Number groups.
Use this form to create groups that can be used to automatically allocate batch numbers and serial numbers.

Using number groups together with items

Associate the number groups with items by using the Batch number group or Serial number group field on the Manage inventory FastTab in the Released product detailsform.
Using number groups makes it easier to trace items in inventory transactions. The tracing functionality is especially important for items that represent a certain risk, such as medicine or chemicals, where errors in production could lead to a recall of the items. It is equally important to be able to trace items that have a guarantee back to the date when the items were sold.

Navigating the form

The following tables provide descriptions for the controls in this form.

Tabs

Tab
Description
General
Define how and when automatic number allocation occurs for each number group.
Activation
Select which areas of the system use automatic number allocation. For example, select Purchase activation to automatically allocate numbers in Accounts payable.

Fields

Field
Description
Number group
Enter a unique identifier for the number group.
Name
Enter a name for the group.
Date
Select this check box to include delivery dates when batch numbers and serial numbers are automatically generated by the system and assigned.
The date comes at the start of the number and uses the YYMMDD format.
Example
Locating inventory receipts to cover a sales order is performed in dimension order. For items that are associated with a tracking dimension group where the batch number dimension is active, orders are processed by batch number. A problem occurs when a purchase order is created for a receipt on May 20 and in batch number 345. A new purchase order is created for a receipt on May 10 and in batch number 346. If a sales order is received for delivery on May 15, the problem occurs when the purchase order is automatically picked for May 20, which is the lowest batch number, and the sales order is delayed. However, when the delivery date is included in the batch number that is automatically generated, the batch numbers are 000520-345 and 000510-346. The auto-reservation then picks the purchase order for May 10.
Reference No.
Select this check box to include the reference number, such as the purchase or production number, in the number.
Lot ID
Select this check box to include the inventory lot number in the number.
Number sequence No.
Select this check box to include the number from the number sequence that is specified in the Number sequence code field as part of the number series.
Number sequence code
Select the number sequence to use to allocate lots or serial numbers.
Manual
Select this check box to manually allocate batch numbers or serial numbers.
Only for inventory transactions
Select this check box to update only the number for transactions in inventory processes. This allows for multiple numbers for each purchase, production, and so on.
On physical update
Select this check box if you do not want the number to be assigned until inventory is updated on a packing slip and reported as finished. You can select this check box only if the Only for inventory transactions check box is also selected.
Per qty.
Specify the receipt quantity for each number. This quantity is typically 1 if a serial or lot number group is involved, and is typically the size of the batch when a batch number group is involved.
Order activation
Select this check box to enable automatic number allocation in Accounts receivable. For credit notes, new numbers are generated when items are returned.
Purchase activation
Select this check box to enable automatic number allocation in Accounts payable.
Inventory activation
Select this check box to enable automatic number allocation in Inventory management.
Production activation
Select this check box to enable automatic number allocation in Production control.
Kanban activation
Select this check box to enable automatic number allocation for lean manufacturing.
Source : https://technet.microsoft.com/en-us/library/aa591648.aspx