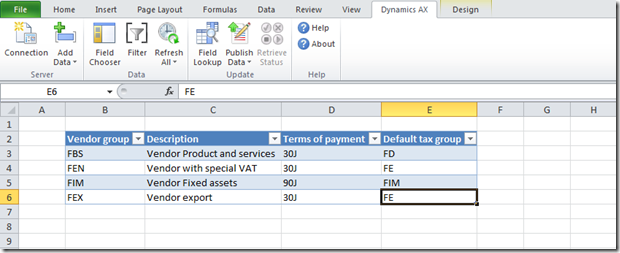
Dynamics Excel Add-In
This article presents an example of the Excel Add In utility in Dynamics AX 2012


And load the updated data into Dynamics Ax


Or you can add a new record:


Step 1: Identify the table in Dynamics AX
- Open the table you want to use in Excel Add In
- Right click > Personalize

- Note the table name

Step 2: Import the table in Excel
- Open Excel and go to the Dynamics AX tab
- Click “Connexion”
- Select the company

- Click “Add data”
- Select “Add table”

- Retreive the table and add it to the Selected table area

- Select option “Create worksheets”
- Click “OK”

- Table is open in Excel:
- Key fields are automatically selected

- Add column:
- Double click to add a column

Step 3: Refresh the data of the table
- Close the “Field Chooser” bar
- Click inside the table
- Click “Refresh All” > “Refresh Current”

- All the data from Dynamics AX are loaded in the Excel file

Step 4: Update or create a new record
You can now update the data:- for example the description

And load the updated data into Dynamics Ax
- Click “Publish” > “Publish selected” to publish only the current worksheet

- Once the data are published, a new sheet is created with the details of the import status

- Check in Dynamics AX: the table has been updated

Or you can add a new record:
- Create a new line in the excel table
- Populate all the fields

-
Click “Publish all”
Remark: If there is an error (a code does not exist
for example), the error will be describe in the status report and the
record is not imported.
- Check in Dynamics AX: new record has been created

No comments:
Post a Comment