In
this post we are going to setup Dynamics AX Azure instance for Dynamics
Mobile Apps using a Self-Signed Certificate. This is only for
development / demo environments. In production, we will be using
certificate from the Public CA like godaddy etc. Also remember we only
have one DEMO VM with all AX components installed on it.
As this is going to be a lengthy post, here is the breakdown of the steps we need to follow:
Click on Connection Information and note down Default Issuer and Default Key, will be used later.
Note VM DNS name. This will be used throughout the configuration process.
Example: <Azure DNS Name>.cloudapp.net
Add a stand-alone endpoint
You will see endpoint created


On DEMO VM, we will use Contoso Certification Authority that is already installed for us.
Open IIS Manager (inetmgr) to create self-signed certificate request.
Common name will be same as your Azure DNS Name.

Save the file. File will look like this and the content of this file will be used for submitting the certificate request.

Now open Contoso Certificate Server, https://localhost/CertSrv to complete the certification request.
Copy paste the Certificate Request text file content, select Web Server.
Download the certificate file.


Copy the thumbnail value of the certificate, will be used later while configuring the AX Mobile Connector.

Note: We will be running our Mobile Apps for user contoso\administrator but you can use any user and just install the certificate for that user as well. In production, we will be using the certificate from Public CA.
Open the certificate and install.
Finish and import again for Current User and Trusted Root Certification Authorities store.
 Finish the wizard.
Now install the certificate for Local Machine and for both the stores.

You should see the certificate installed on these four locations.


Select HTTPS binding and use the self-signed certificate.
Restart IIS (iisreset).


Select the self-signed certificate we created earlier. Federation Service Name should populate your azure dsn name.


Note: If you see an error like “contoso\admin could not be dropped, already exist”, simply re-run the federation service configuration wizard and override the database.
Once done, you should see these two databases AdfsArtifactStore and AdfsConfiguration.
Grant access to the users manage private keys

Add "NT Service\adfssrv" from AX2012R2A.


Make sure Federation Service name and identifier matches with the public DNS name of the azure VM, <Azure DNS Name>.cloudapp.net
Right click AD FS and select Edit Federation Service Properties

Next we’ll assign our newly created Self-Signed certificate as Service communications certificate, Token-decrypting certificate and Token-signing certificate in ADFS --> Service --> Certificates settings.
Select certificates.
Set Server Communication Certificate

Confirm Yes on the next screen.


Right click on the certificate and set as primary.

Select Yes.

Add Token-Decryption Certificate

Set as Primary.

Restart AD FS.


Click Update.

These steps can be performed on your host laptop/pc
https://<azure dns name>.cloudapp.net/adfs/ls/idpinitiatedsignon.aspx
Example: https://ax2012r3-demo-ax2012r3cu8-xxx.cloudapp.net/adfs/ls/idpinitiatedsignon.aspx


If
you noticed above, we are getting certificate error and that is correct
as no one recognizes our VM/Server as trusted public CA. We will fix it
in a minute.
These steps will be performed on AX DEMO VM

Update the following fields


You can also check event viewer for detailed trace.
Azure Service Bus Relay will now show listeners.

Before you can run the app, remember we still need to fix the certification trust error? Lets fix that…


Successful login and data fetched from AX.

Now after that hard work, your Dynamics AX Mobile Apps should work with Azure AX instance. :)
(Reference: https://community.dynamics.com/ax/b/axfortechies/archive/2015/05/04/dynamics-ax-2012-r3-mobile-apps-configuration-using-self-signed-certificate)
As this is going to be a lengthy post, here is the breakdown of the steps we need to follow:
- Create Azure Service Bus
- Azure VM Setup
- Review public DNS name for AX VM
- Add an endpoint to the VM
- Change VM Host file
- Install and Configure Active Directory Federation Services AD FS (hardest part)
- Create/Install SSL certificate from Public CA or from your organization
- Install/Config AD FS
- Grant access to the users manage private keys
- Update AD FS Certificates
- Create Relying Party Trust to the Azure Service Bus
- Add Claim Rule
- Configure the Azure Service Bus Access Control Services (ACS)
- Add Identity Provider
- Modify Rule Groups
- Update AD FS Relying Party Trust
- Test AD FS
- Configure Dynamics AX Mobile Connector
- Install, config and run Mobile Apps
- Install Self-Signed certificate on client machine
Let's get started.
These steps will be performed on Microsoft Azure Portal
These steps will be performed on Microsoft Azure Portal
Azure Service Bus
Open Azure management portal to create Service Bus. Remember namespace name as this will used later in the configuration.
 |
| Click CREATE and complete the form |
 |
| Connection Information |
Azure VM Setup
Open Azure management portal and look for your AX VM. |
| Dynamics AX VM |
Example: <Azure DNS Name>.cloudapp.net
 |
| Azure VM DNS Name |
Add an endpoint to the VM
Click on your VM name to modify settings.
The
next thing you’ll need is an endpoint so that people can actually
access it over port 80. You see by default, this VM can only be accessed
via PowerShell or RDP which is why there are only two endpoints
configured in the management portal.
 |
| ENDPOINTS tab and click ADD |
Lets enable HTTPS on port 443 for secure communication.
 |
| Click NEXT |
 |
| Select HTTPS and click FINISH |
These steps will be performed on AX DEMO VM
Change HOST file on VM
Change HOST file name on Azure VM in order to translate machines IP Address into a name (<Azure DNS Name>.cloudapp.net)Create Self-Signed SSL Certificate
We will use Active Directory Certificate Services to issue a SSL certificate. Make sure this is enabled. |
| Active Directory Certificate Services |
Open IIS Manager (inetmgr) to create self-signed certificate request.
 |
| IIS - Server Certificates |
 |
| Create Certificate Request |
Save the file. File will look like this and the content of this file will be used for submitting the certificate request.
Now open Contoso Certificate Server, https://localhost/CertSrv to complete the certification request.
 |
| Certificate Server |
 |
| Request a Certificate |
 |
| Advance Certificate Request |
 |
| Submit Request |
Verify certificate
Copy the thumbnail value of the certificate, will be used later while configuring the AX Mobile Connector.
Install Self-Signed SSL Certificate
We can now install this certificate for both Local Machine and Current User into both Personal and Trusted Root Certification Authorities certificate stores (4 certificate imports).Note: We will be running our Mobile Apps for user contoso\administrator but you can use any user and just install the certificate for that user as well. In production, we will be using the certificate from Public CA.
Open the certificate and install.
 |
| Install Certificate |
 |
| Current User |
 |
| Personal Certificate Store |
Now install the certificate for Local Machine and for both the stores.
 |
| Local Machine |
Verify the import
Open the console mmc.exe and add two Certificates add-ins. One for current user and one for local computer.
You should see the certificate installed on these four locations.
Configure IIS - Default Web Site
Next step will be to assign our newly created Self-Signed certificate as SSL certificate in IIS for Default Web site.Restart IIS (iisreset).
Install Active Directory Federation Services (AD FS)
There
is nothing much here to say, just open Server Manager, click on Add
Roles and Features wizard. Select Active Directory Federation Services
and complete the wizard.
Once Ad FS is installed, go to the Server Manager, and click on configure federation services on this server.Configure Active Directory Federation Services (AD FS)
Select the self-signed certificate we created earlier. Federation Service Name should populate your azure dsn name.
Note: If you see an error like “contoso\admin could not be dropped, already exist”, simply re-run the federation service configuration wizard and override the database.
Once done, you should see these two databases AdfsArtifactStore and AdfsConfiguration.
 |
| SQL Server Management Studio |
Add "NT Service\adfssrv" from AX2012R2A.
Update Active Directory Federation Services Certificates
Open PowerShell and run the following commands
- Set-ADFSProperties -AutoCertificateRollover $false
- Set-ADFSProperties -nettcpport 1160
Open AD FS Manager
Go to the start menu and search for AD FS
Make sure Federation Service name and identifier matches with the public DNS name of the azure VM, <Azure DNS Name>.cloudapp.net
Right click AD FS and select Edit Federation Service Properties
Next we’ll assign our newly created Self-Signed certificate as Service communications certificate, Token-decrypting certificate and Token-signing certificate in ADFS --> Service --> Certificates settings.
Select certificates.
 |
| Set Server Communication Certificate |
Confirm Yes on the next screen.
Add Token-Signing Certificate
Select Yes.
Add Token-Decryption Certificate
Set as Primary.
Restart AD FS.
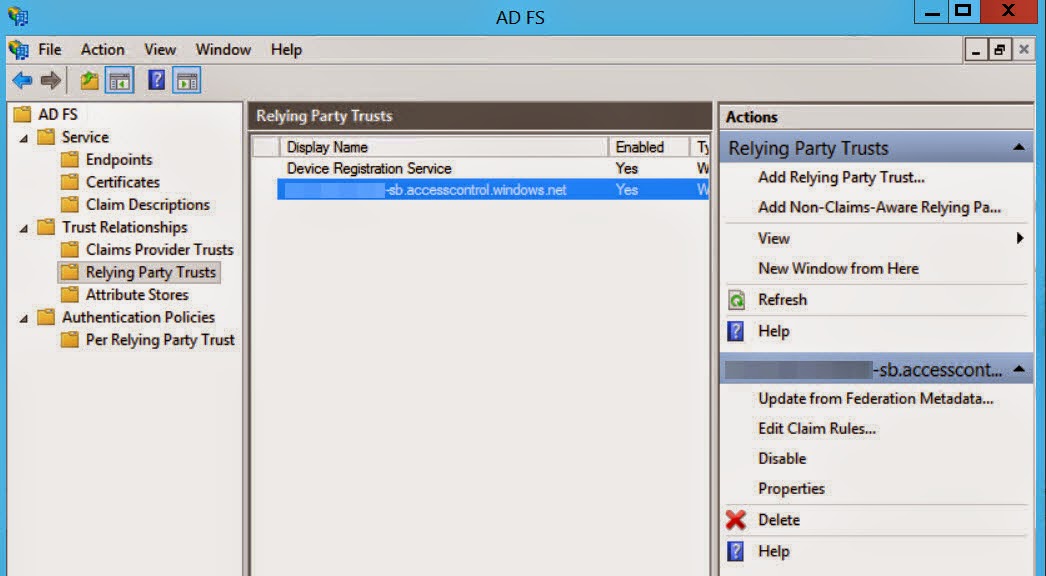
Create Relying Party Trust
Create a new Relying Party Trust to the Azure Service Bus- Launch AD FS manager
- Expand Trust Relationships
- Select Relying Party Trusts and Add Relying Party Trust…
- Click Start
- Select
Import data and enter
https://<Servicebusname>-sb.accesscontrol.windows.net/federationmetadata/2007-06/federationmetadata.xml
Example: https://axcontosomobile-sb.accesscontrol.windows.net/federationmetadata/2007-06/federationmetadata.xml
- Click next until the wizard is complete
- The claims rule window will pop open
- Click Add Rule
- Select Pass Through or Filter an Incoming Claim
- Click Next
- In Claim Rule Name enter Windows Account Name
- From Incoming claim type select Windows Account Name
- Click Finish
- Click OK
These steps will be performed on Microsoft Azure Portal
Configure the Azure Service Bus Access Control Services
- Login into Microsoft Azure and select Service Bus that we created earlier.
|
| Connection Information |
- From the bottom, select Connection Information.
- Take note of the Default Key. We will use it later while configuring AX Mobile Connector.
Open ACS Management Portal
- Select Identity Providers
- Select Add
- Select WS-Federation identity Provider, Click Next
- In Display Name field enter Contoso ADFS
- In URL Enter the URL to the ADFS server using the virtual machine DNS name from earlier configuration. Example: https://<azure dns name>.cloudapp.net/federationmetadata/2007-06/federationmetadata.xml
- In Login Link Text enter Contoso ADFS
- Click Save
- Select Rule Groups
- Select Default Rule Group for ServiceBus
- Review each predefined rule and delete the rules that have Output claim values of Manage and Send
- Click Add to add a new Claim rule
- In Select Type select http://schemas.microsoft.com/ws/2008/06/identity/claims/windowsaccountname
- In Enter Type enter net.windows.servicebus.action
- In Enter Value enter Send
- Click Save
These steps will be performed on AX DEMO VM
Update Relying Party Trust
Open AD FS manager and update Relying Party Trust we created earlier to the Azure Service Bus.
Click Update.
These steps can be performed on your host laptop/pc
Test AD FS
You can test ADFS is it is installed correctly and authenticating users. Use this URL to check if users are being authenticated.https://<azure dns name>.cloudapp.net/adfs/ls/idpinitiatedsignon.aspx
Example: https://ax2012r3-demo-ax2012r3cu8-xxx.cloudapp.net/adfs/ls/idpinitiatedsignon.aspx
These steps will be performed on AX DEMO VM
Configure Dynamics AX Mobile Connector
Open Microsoft Dynamics AX Connector for Mobile Applications.
 |
| Before configuring, is in Stopped state. |
Update the following fields
- Azure Service namespace: Name of the Service Bus
- Azure service identity password: Default Key of the Service Bus
- Thumbprint of X.509 certificate used to sign SAML token. This is your self-signed certificate’s thumbprint, no question mark and no spaces.
- ADFS URL, enter the public DNS name used for the virtual machine.
Example: https://ax2012r3-demo-ax2012r3cu8-xxx.cloudapp.net/adfs/services/trust/13/usernamemixed - Click Save and Start
You can also check event viewer for detailed trace.
Azure Service Bus Relay will now show listeners.
Install, config and run Dynamics AX Mobile Apps
Finally, after all this hard work, it’s time to run Dynamics AX Apps :) . For this, we will run Dynamics AX 2012 Expense app on Windows 8.1 machine.Before you can run the app, remember we still need to fix the certification trust error? Lets fix that…
Install Self-Signed SSL certificate on your computer/laptop where the app will be running
- Export the certificate from the VM
- No, do not export the private key.
- DER encoded binary X.509 (.CER)
- Save the file
- Import certificate on your computer / laptop in the following certificate stores (Certificates-LocalComputer / Trusted Root Certificate Authority and Certificates-LocalComputer / Trusted People)
Windows 8.1 App Login
Service connection name is your Azure Service Bus namespace.
Successful login and data fetched from AX.

Now after that hard work, your Dynamics AX Mobile Apps should work with Azure AX instance. :)
(Reference: https://community.dynamics.com/ax/b/axfortechies/archive/2015/05/04/dynamics-ax-2012-r3-mobile-apps-configuration-using-self-signed-certificate)
No comments:
Post a Comment