Hi,
This blog is going to cover the location setup within AX 2012 R3 WAX.
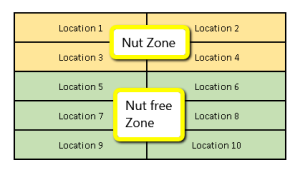
To best demonstrate this I’m going to deign a simple warehouse with 2 location zones a Nut zone and a Nut free zone.
NOTE – Make sure that your warehouse has been activated to use the warehouse management process.
Zone group
The first area you will need to setup will be the zone group, Zone groups group multiple zones.
Zones
The first area you will need to setup will be the zones, each zone need to belong to a zone Group.
Location formats
Next you will need to create the location formats which will make up the naming convention for the locations.
Location profiles
Next we need to setup the location profiles, these control some of the characteristics of the location.
Location setup Wizard
Now that we’ve configured the zones and profiles we’re ready to generate our locations.
Validate the locations
Next we need to validate that the locations have been created correctly:
This blog is going to cover the location setup within AX 2012 R3 WAX.
To best demonstrate this I’m going to deign a simple warehouse with 2 location zones a Nut zone and a Nut free zone.

NOTE – Make sure that your warehouse has been activated to use the warehouse management process.
Zone group
The first area you will need to setup will be the zone group, Zone groups group multiple zones.
- Navigate to Warehouse management > Setup > Warehouse setup > Zone groups
- Click New
- Create 2 groups NUT and NUT FREE
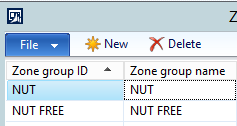
- Close the form

Zones
The first area you will need to setup will be the zones, each zone need to belong to a zone Group.
- Navigate to Warehouse management > Setup > Warehouse setup > Zones
- Click New
- Create 2 zones NUT and NUT FREE
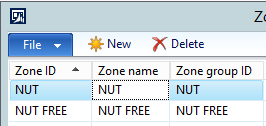
- Close the form

Location formats
Next you will need to create the location formats which will make up the naming convention for the locations.
- Navigate to Warehouse management > Setup > Warehouse setup > Location formats
- Click New
- Create 2 location formats one for the Nut zone and one for the nut free zone
- In the details section create a new segment.
- Segment description – Enter any description
- Length – In my example I’m going use a number sequence length of 3 characters
- Separator – This acts as a suffix to the number sequence, I’m going to setup the following:
- Nut free = “F”
- Example – 000F
- Nut zone = “N”
- Example – 000N
- Nut free = “F”
- This should leave you with the following:
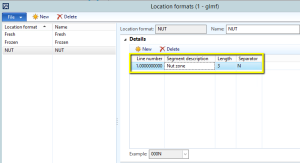
- Close the form.

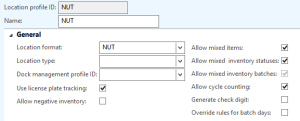
Location profiles
Next we need to setup the location profiles, these control some of the characteristics of the location.
- Navigate to Warehouse management > Setup > Warehouse Setup > Location profiles
- Click New
- Create 2 profiles NUT and NUT FREE
- Create the profiles and ensure that the following are selected:
- Use License plate tracking – This enables license plate tracking (more info here)
- Allow mixed items – Allows mixed items to be stored in a location
- Allow mixed inventory status – Allows mixed inventory status in the location
- Allow cycle counting – Allows the user to cycle count the location
- Save and close the form

Location setup Wizard
Now that we’ve configured the zones and profiles we’re ready to generate our locations.
- Navigate to Warehouse management > Setup > Warehouse setup > Location setup Wizard
- We are going to be doing two time’s (One for the Nut zone and one for the Non-Nut zone)
- NUT setup:
- In the wizard screen define the following:
- Warehouse – [Your warehouse]
- Zone ID – NUT
- Location profile ID – NUT
- This should generate a line in the grid below in this grid we can
now define the number of locations we would like. In my example I’m
going to create 4 locations so from location 1 to location 4.
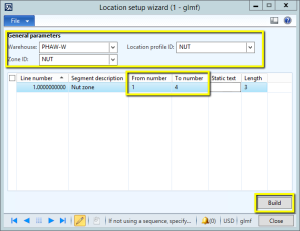
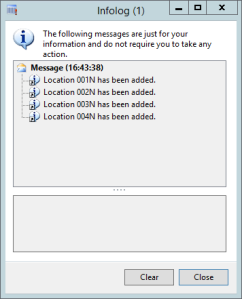
- Once here click Build to generate the locations
- This should generate an info log confirming the locations created:
- In the wizard screen define the following:
- Repeat this setup for Nut Free zone, the only difference should be:
- Zone ID = NUT FREE
- Location profile Id = NUT FREE
- Select the locations 5 to 10
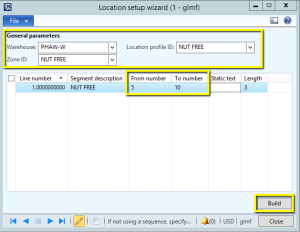
- Click Build, and confirm the info log:
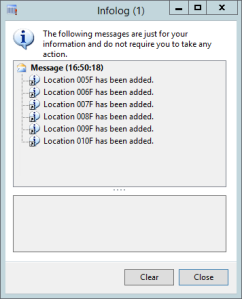
- Close the info log.


Validate the locations
Next we need to validate that the locations have been created correctly:
- Navigate to Warehouse management > Setup > Warehouse Setup > Locations
- Validate that you have the following:
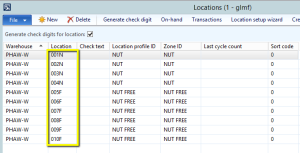
- close the form.

No comments:
Post a Comment